Theme's style customization
If you did not, read this first.
You should know already the Kit’s starters use ready-to-use themes delivered by @react-website-themes. The themes in turn use emotion, a superb css-in-js library.
CSS variables
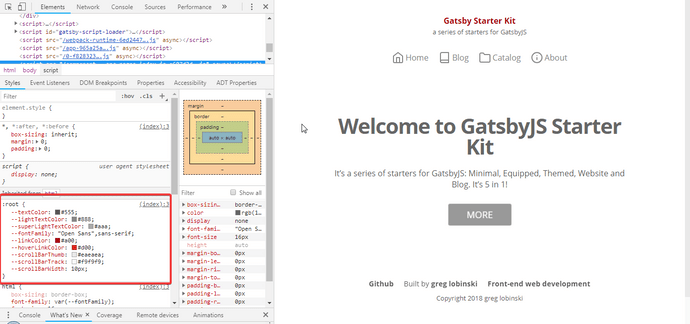
Let’s investigate what happens when the Blog starter imports ‘variables’.
import '@react-website-themes/default/styles/variables';Below is the code of the file
import 'typeface-open-sans';
import { injectGlobal } from 'emotion';

const variables = injectGlobal`
  :root {
    --textColor: #555;
    --lightTextColor: #888;
    --superLightTextColor: #aaa;
    --fontFamily: "Open Sans", sans-serif;
    --linkColor: #a00;
    --hoverLinkColor: #d00;
    --scrollBarThumb: #eaeaea;
    --scrollBarTrack: #f9f9f9;
    --scrollBarWidth: 10px;
  }
`;

export default variables;
First, we import Open Sans typeface.
Second, we use the emotion’s injectGlobal method to add some CSS variables to the root element.
Customization
You can although do not import the variable file and create your own local one or override just some of the variables. You can also add new ones.
import { injectGlobal } from 'emotion';

/* ... */

import '@react-website-themes/default/styles/variables';

/* ... */

/* ovveride/add new variables*/
injectGlobal`
  :root {
    --textColor: orange;
    --actionColor: #555;
  }
`;
Global styles
Global styles works exactly the same way as the described above variables. They are separated to an another file only for flexibility.
import '@react-website-themes/default/styles/global';Below is the code of the file
import { injectGlobal } from 'emotion';

const global = injectGlobal`
  html {
    box-sizing: border-box;
    font-family: var(--fontFamily);
    font-size: 16px;
    color: #666;
  }

  *,
  *:after,
  *:before {
    box-sizing: inherit;
    margin: 0;
    padding: 0;
  }

  p {
    color: var(--textColor);
  }

  h1 {
    font-size: 2.4em;
  }

  h2 {
    font-size: 1.8em;
  }

  ul {
    list-style-position: inside;
  }

  a {
    color: var(--linkColor);
    transition: .3s;
  }

  @media (hover: hover)  {
    a:hover {
      color: var(--hoverLinkColor);
    }
  }

  *::-webkit-scrollbar {
    width: var(--scrollBarWidth);
  }
  *::-webkit-scrollbar-track {
    background: var(--scrollBarTrack);
  }
  *::-webkit-scrollbar-thumb {
    background-color: var(--scrollBarThumb);
  }

`;

export default global;
Do you see the same emotion’s injectGlobal method? Nothing new here, right?
Customization.
Like with variables, you can swap the whole file or override/add only some rules.
import { injectGlobal } from 'emotion';

/* ... */

import '@react-website-themes/default/styles/global';

/* ... */

/* ovveride/add new variables*/
injectGlobal`
  h1 {
    font-size: 5em;
    font-weight: 300;
    color: pink;
  }

  h3 {
    font-size: 0.5em;
    color: blue;
  }
`;
Components’ styles
Take a look at the Layout component.
import PropTypes from 'prop-types';
import React from 'react';
import { cx } from 'emotion';

import style from '../styles/layout';

const Layout = props => {
  const { children, themeStyle = style, customStyle = '' } = props;

  return (
    <div className={cx(themeStyle, customStyle)}>
      <main>{children}</main>
    </div>
  );
};

Layout.propTypes = {
  children: PropTypes.node.isRequired,
  themeStyle: PropTypes.string,
  customStyle: PropTypes.string,
};

export default Layout;
Every component, except the Seo one, expect two optional style props:
themeStylecustomStyle
When the themeStyle prop is undefined, what is a suggested usage, the component assigns to it the built-in style.
If customTheme is undefined, the component assigns to it an empty string.
Both of the styles themeStyle and customStyle are merged into one by the emotion’s cx method.
Customization
You can override the built-in styles by providing a customStyle prop for the component.
import { css } from 'emotion';

/* ... */

const layoutCustomStyle = css`
  padding: 100px;
`;

const IndexPage = props => {
  /* ... */

  return <Layout customStyle={layoutCustomStyle}>...</Layout>;
};
That’s all you need to know to effectively customize the look of the Kit’s starters.
Follow me on Twitter if you want to be informed about the new incoming guides.
